How To Season A Swag: Tips From A Wangaratta Camping Store
Seasoning a new canvas swag means thoroughly wetting it, letting it dry, then repeating the process so the canvas fibres and stitching swell and settle around the needle holes. It is worth doing before your first trip, particularly around North East Victoria where cool nights and heavy morning dew can test a new swag unexpectedly. If you've just bought a swag, here's how to prepare it properly.
What Does It Mean to Season a Swag?
Seasoning prepares new canvas for wet conditions. During manufacturing, stitching creates tiny needle holes through the material. Repeated wetting and drying helps the canvas and thread swell around these points, improving the seal along the seams.
It also gives you a chance to test your swag at home rather than discovering a problem at camp. Always check the manufacturer's instructions first, as seasoning and care requirements can vary between products.
Are Swags Waterproof Straight Out of the Box?
Quality canvas swags are designed to provide weather protection, but many manufacturers recommend seasoning before the first trip. A new swag may initially allow small amounts of moisture through stitching or seams before the canvas has been properly wet and dried. That doesn't necessarily indicate a faulty product.
If you're buying from a camping store in Wangaratta, ask whether your particular swag requires seasoning and what process the manufacturer recommends.
How to Season a Swag Before Your First Camping Trip
Choose a clear day when you have enough time for the swag to dry completely between wetting cycles.
1. Set Up the Swag
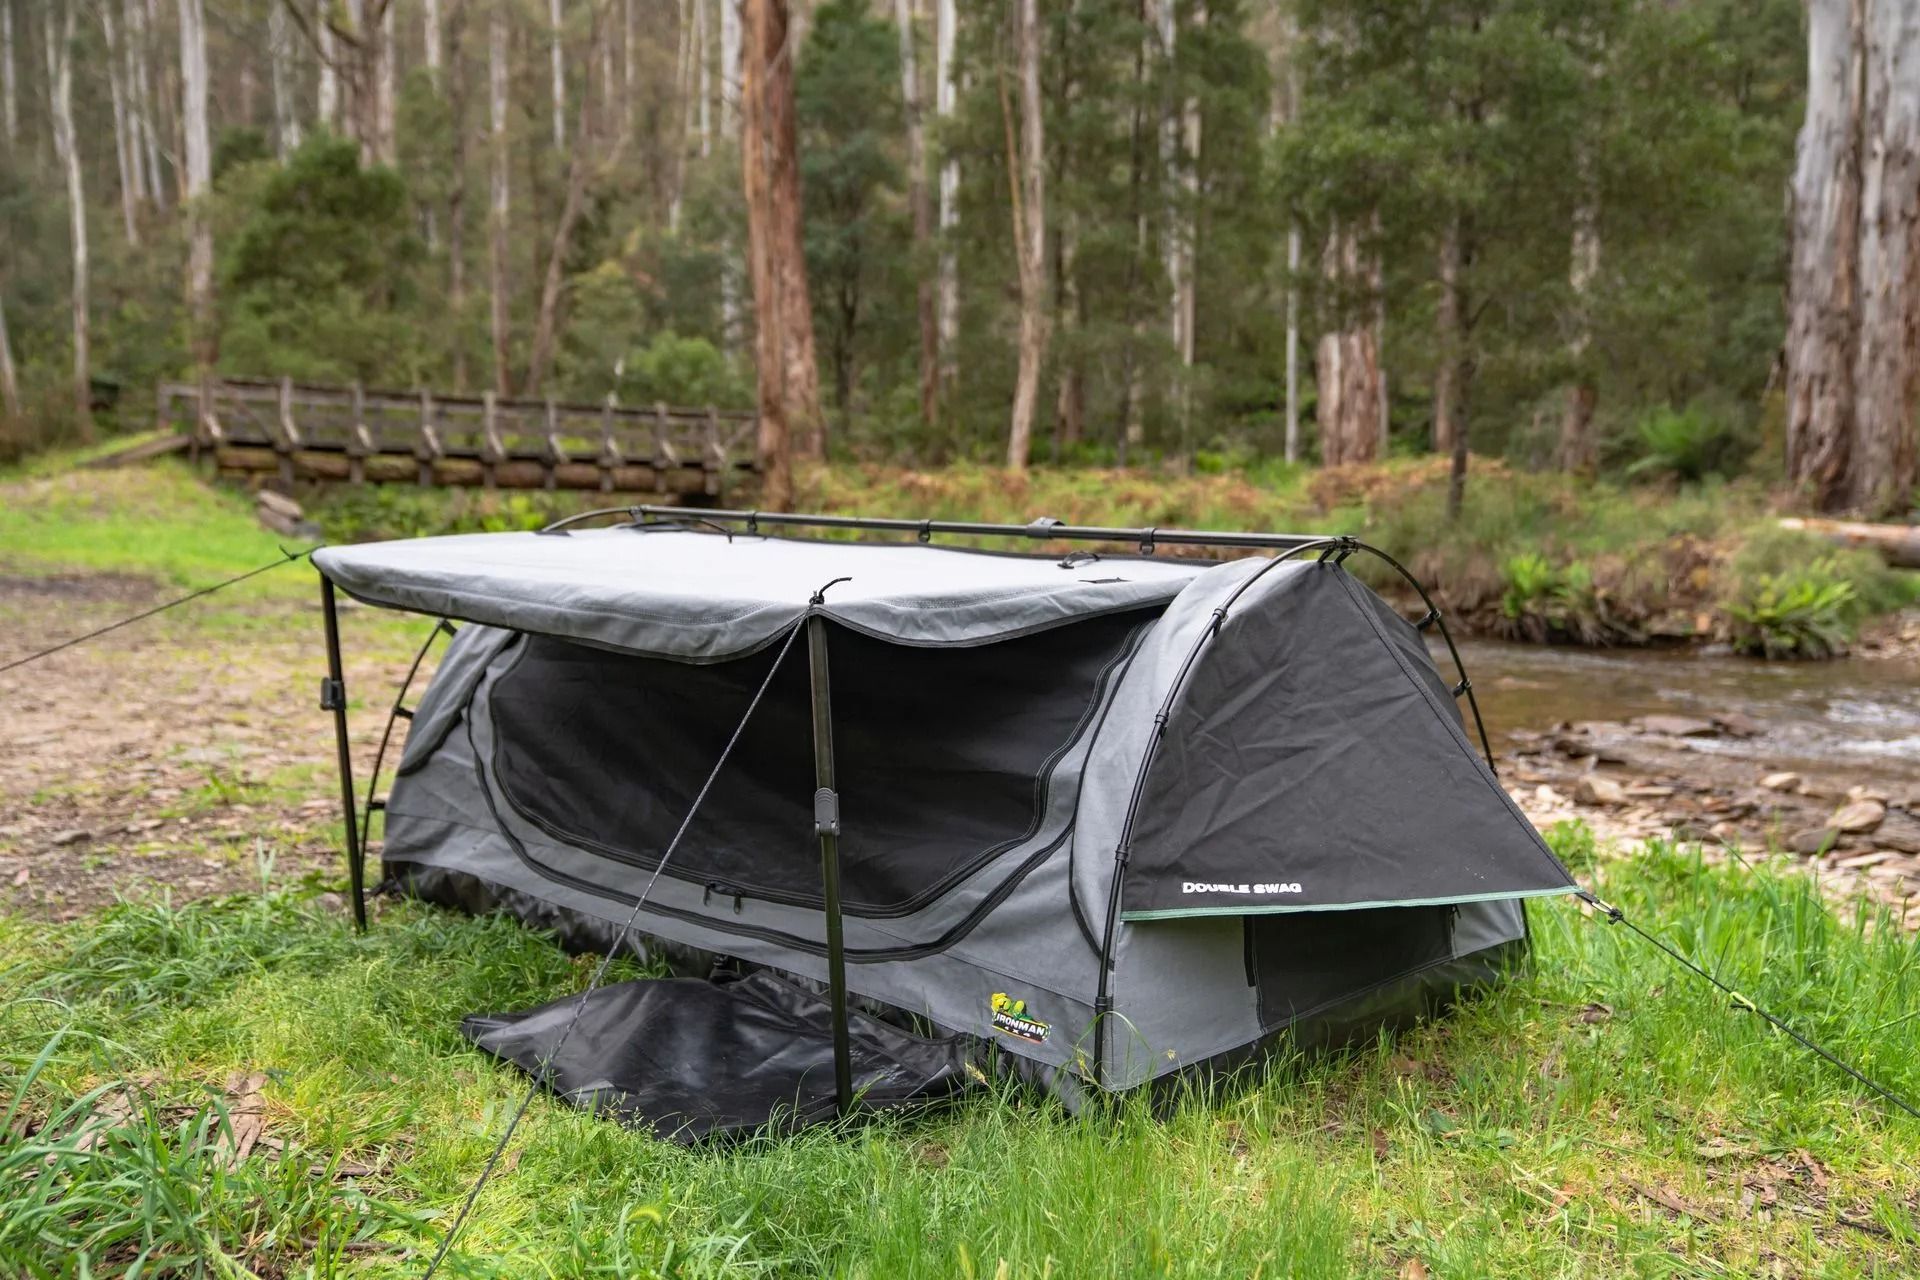
Erect the swag exactly as you would at camp. Install the poles, tension the canvas correctly and make sure all panels and seams are exposed. A clean backyard is usually an ideal place to do this.
2. Soak the Canvas
Use a garden hose to wet the entire exterior thoroughly. Pay particular attention to seams, corners and stitched sections. You want to saturate the canvas rather than give it a light spray. Avoid using a high-pressure cleaner, which can be unnecessarily harsh on the canvas and stitching.
3. Let It Dry Completely
Leave the swag erected until the canvas is completely dry. Don't rush this stage or roll the swag away while damp. Good airflow will help the material dry properly.
4. Repeat the Process
Once dry, soak the swag again and allow it to dry completely. Repeat according to the manufacturer's instructions. The repeated wet-and-dry process is what helps the canvas and stitching settle.
5. Check for Water Entry
During the final wetting, inspect the inside for signs of water getting through. If significant leakage remains after you've followed the manufacturer's seasoning instructions, speak to the retailer or manufacturer before applying additional treatments.
How Do You Waterproof a Swag?
For a new canvas swag, proper seasoning should generally come before applying aftermarket waterproofing products. If an older swag begins leaking, first identify where the water is entering. Worn canvas treatment, damaged material, seams or incorrectly secured openings can require different solutions.
Where reproofing is appropriate, use a product specifically designed for your type of canvas and follow the manufacturer's instructions. Avoid applying random sealants or sprays, as unsuitable products may affect the canvas's appearance, breathability or existing treatment.
Why Wangaratta Campers Should Season Their Swags
Camping around Wangaratta and North East Victoria can expose your gear to considerable moisture even when there is no rain forecast. Cool high-country nights can produce substantial morning dew. A swag that was dry at bedtime may be covered in moisture the next morning.
Example: A first-time swag owner heads away on a clear weekend and doesn't expect wet conditions. Overnight temperatures fall and heavy dew forms across the canvas. Because they seasoned and tested the swag beforehand, they already know its seams have been prepared for moisture. Seasoning at home gives you confidence before conditions test the swag in the bush.
Should You Pack a Swag Away Wet?
Sometimes you have little choice but to roll up a damp swag when leaving camp. The important part is what happens afterwards. Unpack it and allow the canvas, mattress and underside to dry thoroughly as soon as practical. Leaving a wet swag rolled up can encourage mould, mildew and unpleasant odours. For long-term storage, keep the swag somewhere clean and dry.
How Should You Care for a Canvas Swag?
Canvas generally benefits from gentle cleaning rather than harsh chemicals or aggressive washing. Brush away loose dirt and follow the manufacturer's instructions for more substantial cleaning. Unless specifically recommended for your product, avoid bleach, strong detergents and pressure washing.
After a trip:
- Remove dirt and debris
- Inspect seams and canvas
- Check zips, poles and fasteners
- Dry everything thoroughly
- Repair damage before your next trip
If your swag has been stored for months, set it up before a longer journey. It's much easier to discover a missing pole or damaged zip in the backyard than at camp.
What Else Should You Take Camping Around Wangaratta?
A well-prepared swag is only one part of a reliable touring setup. Depending on where you're heading, you may also need suitable bedding, lighting, water storage, cooking equipment and 4WD recovery gear. Our guide to the essential 4x4 accessories every camper should own can help with planning.
Your preferred camping style should also influence which shelter you choose. Solo travellers may prioritise compact packed size, while couples and longer-stay campers may want more room. You can browse Wangaratta Offroad's range of swags and rooftop tents to compare options for different setups.
How Do You Make a Swag Last Longer?
Good habits make the biggest difference. Season new canvas correctly, keep the swag clean, deal with small damage early and never leave it stored wet. Before longer trips, set the swag up at home and inspect the seams, poles, pegs, zips and canvas. If it hasn't been exposed to rain for some time, you can also test it with a hose before departure.
The key takeaway is simple: season your swag before relying on it in wet conditions. Repeated wet-and-dry cycles help prepare the canvas and stitching, while testing at home means you're less likely to discover problems during a cold North East Victoria night.
If you're choosing a new swag or upgrading your camping setup, visit Wangaratta Offroad. Our team can help you find gear suited to where and how you travel, with practical advice from your local camping store Wangaratta campers can rely on.
Frequently Asked Questions
How do you season a new swag?
Set the swag up fully, soak the canvas with a garden hose and allow it to dry completely. Repeat the wet-and-dry process according to the manufacturer's instructions.
How many times should you season a swag?
It depends on the swag and manufacturer's recommendations. Multiple thorough wet-and-dry cycles are commonly used to help new canvas and stitching settle.
Are swags waterproof when you buy them?
Canvas swags are designed for weather protection, but many should be seasoned before their first trip. Check the instructions supplied with your particular swag.
Can I use waterproofing spray on a new swag?
Don't automatically apply additional waterproofing to new canvas. Season it as recommended first and only use treatments suitable for that particular material.
What should I do if I pack my swag away wet?
Unroll and dry it thoroughly as soon as practical. Avoid storing damp canvas because moisture can encourage mould, mildew and odours.
Why is the inside of my swag damp if it isn't leaking?
Condensation can create moisture inside a swag, particularly during cold nights with limited ventilation. Internal moisture doesn't always mean water is leaking through the canvas.